Cocoapods插件机制浅析
背景
虽然做iOS开发的过程中使用过 **Cocoapods**, 但是对里面的细节了解其实不算太多,直到这两年做织女项目时,通过对Cocoapods进行Qt支持改造才开始深入了解部分细节,这个过程中,网上没有找到太多相关资料,本文就简单介绍下我对Cocoapods提供的插件机制的一个简单了解,希望能给大家带来一些帮助。
Ruby Open Classes
在此之前,我们简单看下 Ruby Open Classes ,这部分是为未接触过Ruby的同学准备的,熟悉的同学可以直接略过。
在Ruby中,类永远是开放的,你总是可以将新的方法加入到已有的类中,除了你自己的代码中,还可以用在标准库和内置类中,这个特性被称为Ruby Open Classes。下面我们通过一个示例简单看下。
首先,我们自定义一个类Human,放在human.rb文件中:
1 | class Human |
接着,我们新增一个main.rb:
1 | require_relative 'human' |
之后,我们在main.rb中重新定义hungry方法,
1 | class Human |
可以看到,这里在我们新增hungry方法之后,所有的Human类的实例均调用我们的新实现了,即使是已经创建好的实例,这里故意放到两个文件中是想说明这个特性是可以跨文件甚至跨模块的,对Ruby内置方法的替换也是可以的(谨慎使用)
1 | puts "hello".size |
这个特性是十分强大的,让我们可以很容易的对三方模块进行扩展,也是Cocoapods的插件体系所依赖的基础。
流程分析
Cocoapods的插件体系整体流程还是比较清晰的,下面我们就来逐步看下。
CLAide
首先,Cocoapods 提供了一个便捷的命令行工具库 CLAide,这个库包含很多功能,例如,一套命令基类,一套插件加载机制等。
Command基类
Command基类在lib/claide/command.rb中,这里提供了大量基础功能,包括 run 、 options、 help等等。
首先,当我们每次执行 pod xxx 命令时候,会执行 bin目录下的可执行文件pod。
1 | require 'cocoapods' |
这里实际上是 Pod 模块从CLAide继承了子类Command < CLAide::Command,我们执行Pod命令时候,就会调用
1 | def self.run(argv) |
实际上只是扩展了一些检测git版本、xcode证书等,真正核心部分还是调用的CLAide的实现:
1 | def self.run(argv = []) |
可以看到这里真正执行命令之前会遍历所有的插件前缀,并进行插件加载,回过头来再查看 cocoapods/command.rb 会发现,这里指定了约定的插件前缀
1 | self.plugin_prefixes = %w(claide cocoapods) |
可以看到这里的插件分为两种,我们目前只关心文件名为cocoapods前缀的插件。
PluginManager
我们深入PluginManager的具体实现看下,
1 | def self.load_plugins(plugin_prefix) |
为了减小篇幅,这里只贴了核心相关代码,整体的流程大致是:
- 调用
PluginManager.load_plugins并传入插件前缀 PluginManager.plugin_gems_for_prefix对插件名进行处理,取出我们需要加载的文件,例如cocoapods前缀在这里会转换为所有包含cocoapods_plugin.rb的gem spec 信息及文件信息,例如~/cocoapods-qt/lib/cocoapods_plugin.rb- 调用
PluginManager.safe_activate_and_require进行对应的 gem spec 检验并对每个文件进行加载
至此,基本的插件加载流程大致梳理清楚了。
实操
下面我们看下如何自己扩展一个插件,关于这部分,Cocoapods其实也基本已经帮我们做了很多事情了,主要是 cocoapods-plugins, 它提供了一个插件创建的完整生命周期,包括新增、发布、检索等。
Cocoapods-plugins
执行 pod plugins create cocoapods-test 之后,发现自动帮我们创建了一个gem工程,其中的 lib 文件夹下果然存在了一个 cocoapods_plugin.rb 文件,整体的目录结构如下:
1 | ├── Gemfile |
这里最核心的就是cocoapods_plugin.rb ,我们前面分析过,执行pod命令时候会主动加载所有cocoapods_plugin.rb文件,那么只要我们将需要扩展的类加到这里面,执行命令时候就会生效。
1 | class Test < Command |
可以看到这里其实只是新增了一个 Test 命令,并加了一些描述信息。为了让我们的扩展能生效,我们可以通过几种方式,
- 本地gem源码依赖
- 安装gem产物
为了更贴近实际生产发布流程,这里我们采用第二种方式。
首先,我们编译生成gem产物,
1 | gem build cocoapods-test.gemspec |
其次,本地安装
1 | gem install ~/CocoapodsQt/cocoapods-test/cocoapods-test-0.0.1.gem --local |
此时,我们再执行 pod 命令
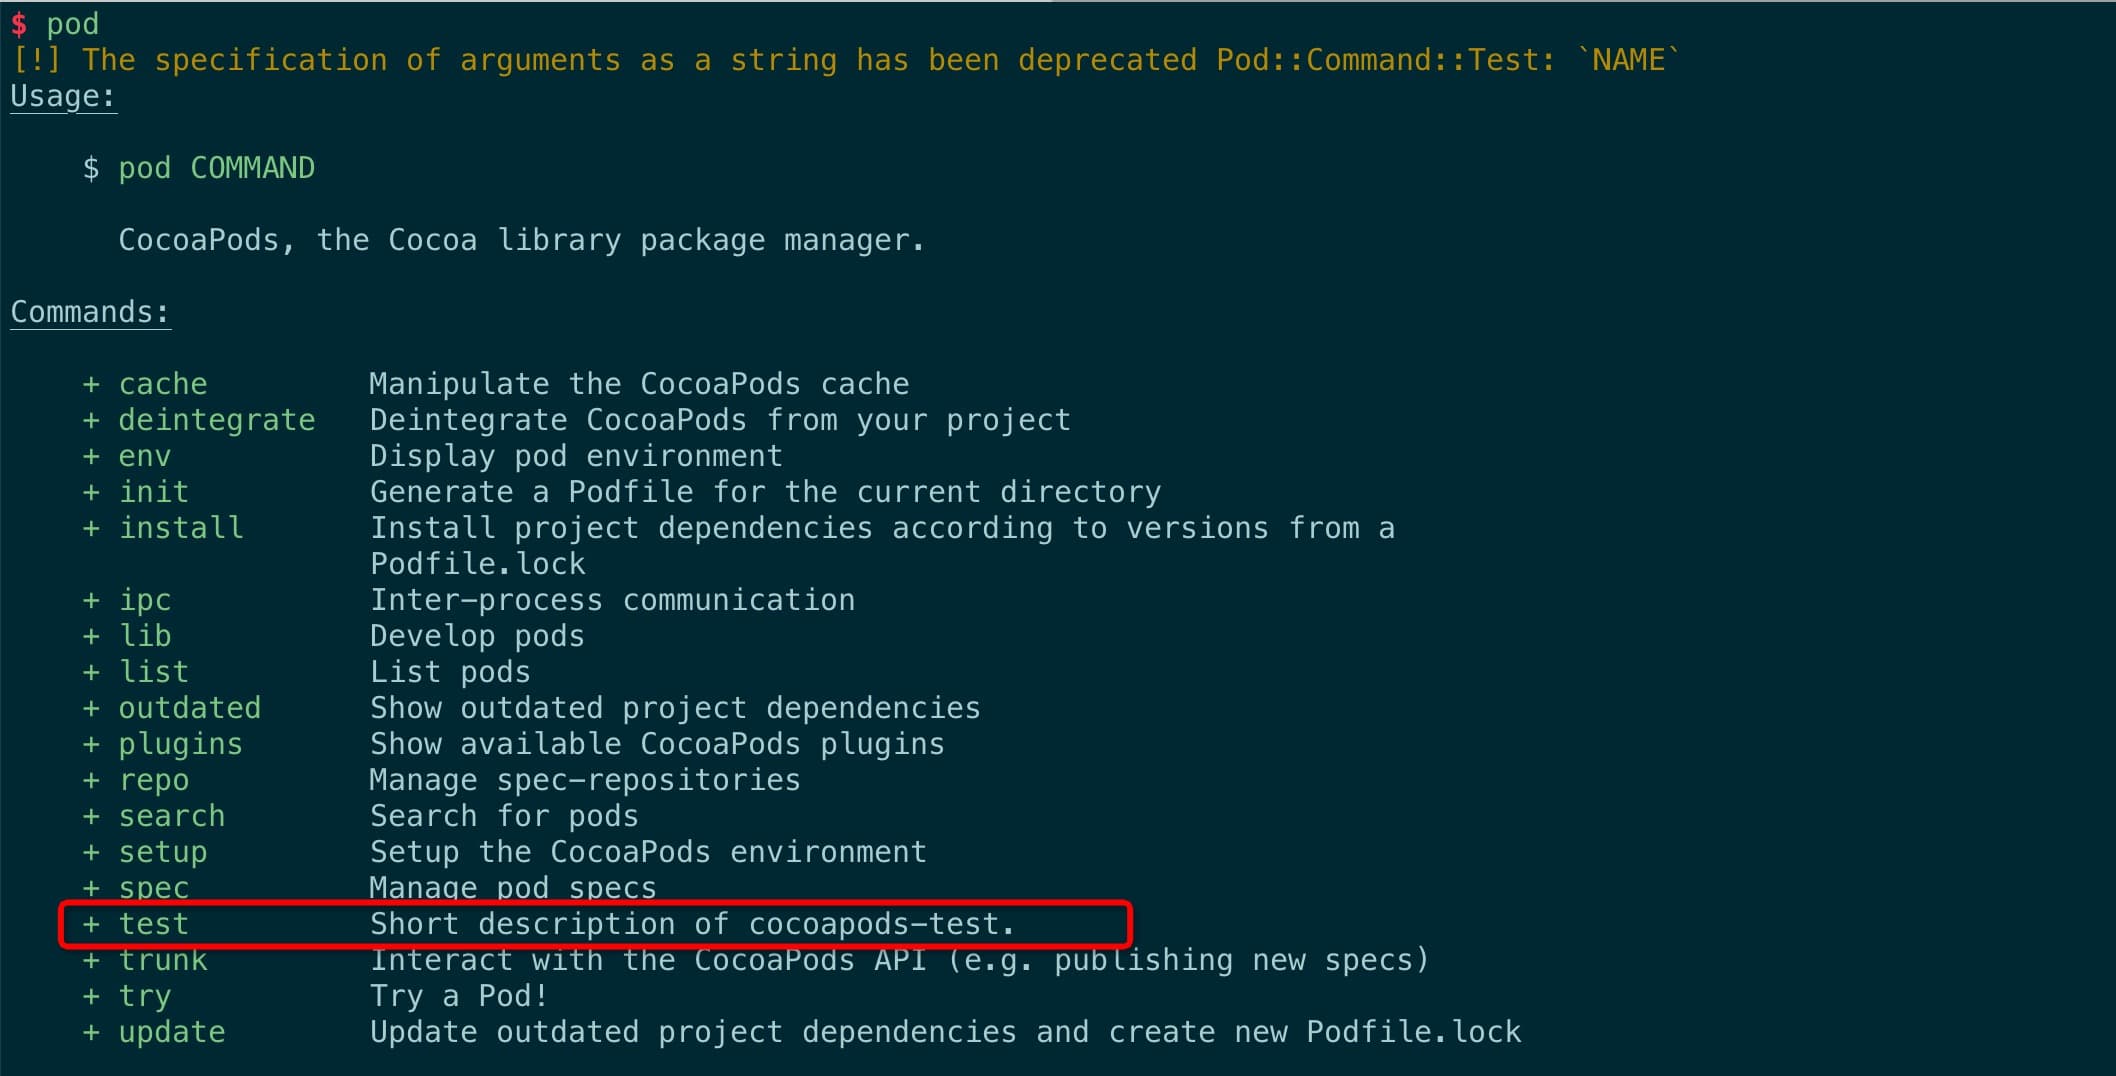
可以看到我们扩展的命令已经生效,接下来就可以开始愉快的coding了。
结语
至此,我们对Cocoapods的整体插件流程应该有了一个比较清晰的认识了,希望能给大家带来一些帮助。